Showing posts with label Snow. Show all posts

Sunday, December 30, 2012

Snow Dough

Turn your usual play dough into snow dough! Your child/ren will have plenty of fun playing in the "snow" with this dough. They can make snowmen, icebergs, or whatever their little heart desires!  Add some penguin figurines and they can even pretend they are in the South Pole!

 Materials/Ingredients:  Flour, salt, water, oil, cream of tartar, silver glitter, wax paper, wooden spoon, saucepan, measuring cups, measuring spoons, Ziploc bag or air-tight container.
 To make the dough you will need 2 cups of flour,
 1 cup of salt,
 4 tsp. cream of tartar,
 4 tsp. oil,
 and 2 cups of water.  Mix all of these ingredients in a saucepan over medium heat.

 Mix continuously until the mixture thickens and pulls away from the pan.


 Form dough into a ball and place on a piece of wax paper. 
 Allow to cool and then knead until it is no longer sticky.  If the dough is still too sticky, then dust with a little bit of flour.
 After kneading, sprinkle generously with silver glitter.  Knead and sprinkle with more glitter.

When dough has cooled, save in a sealed bag or air-tight container so that it does not dry out.

Saturday, December 29, 2012

White as Snow

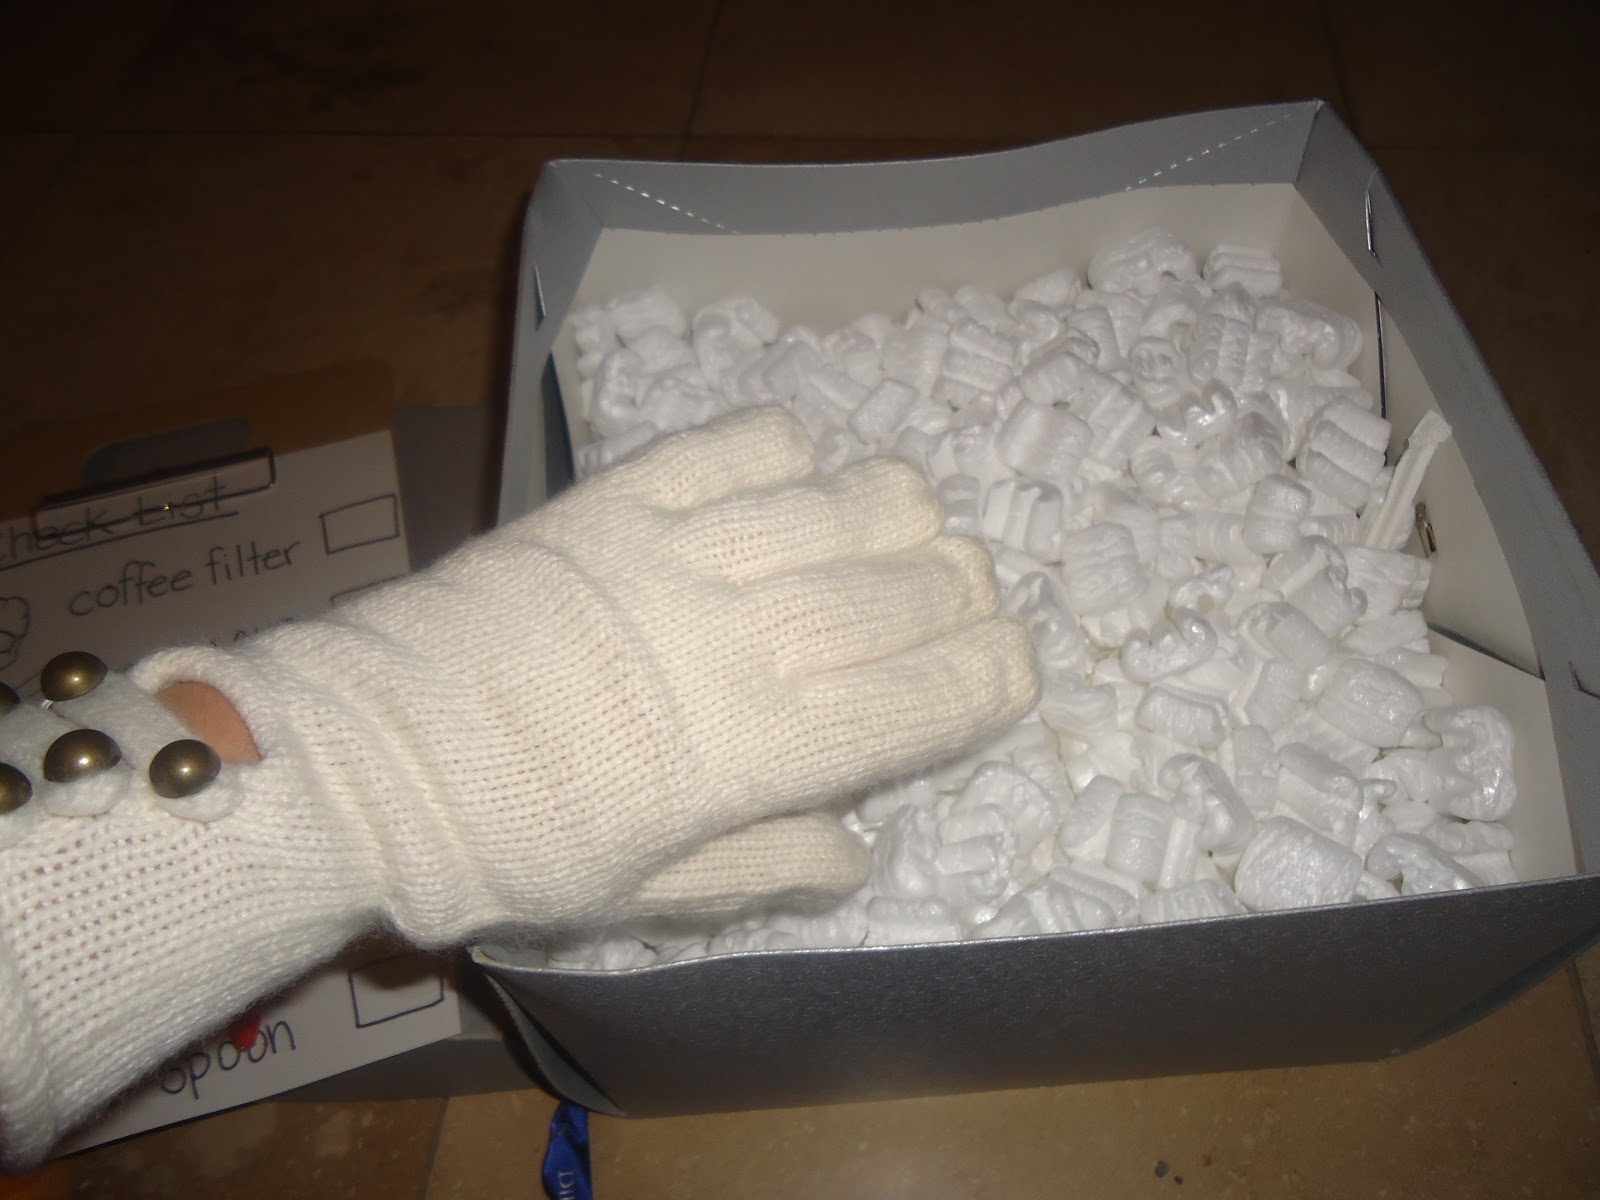
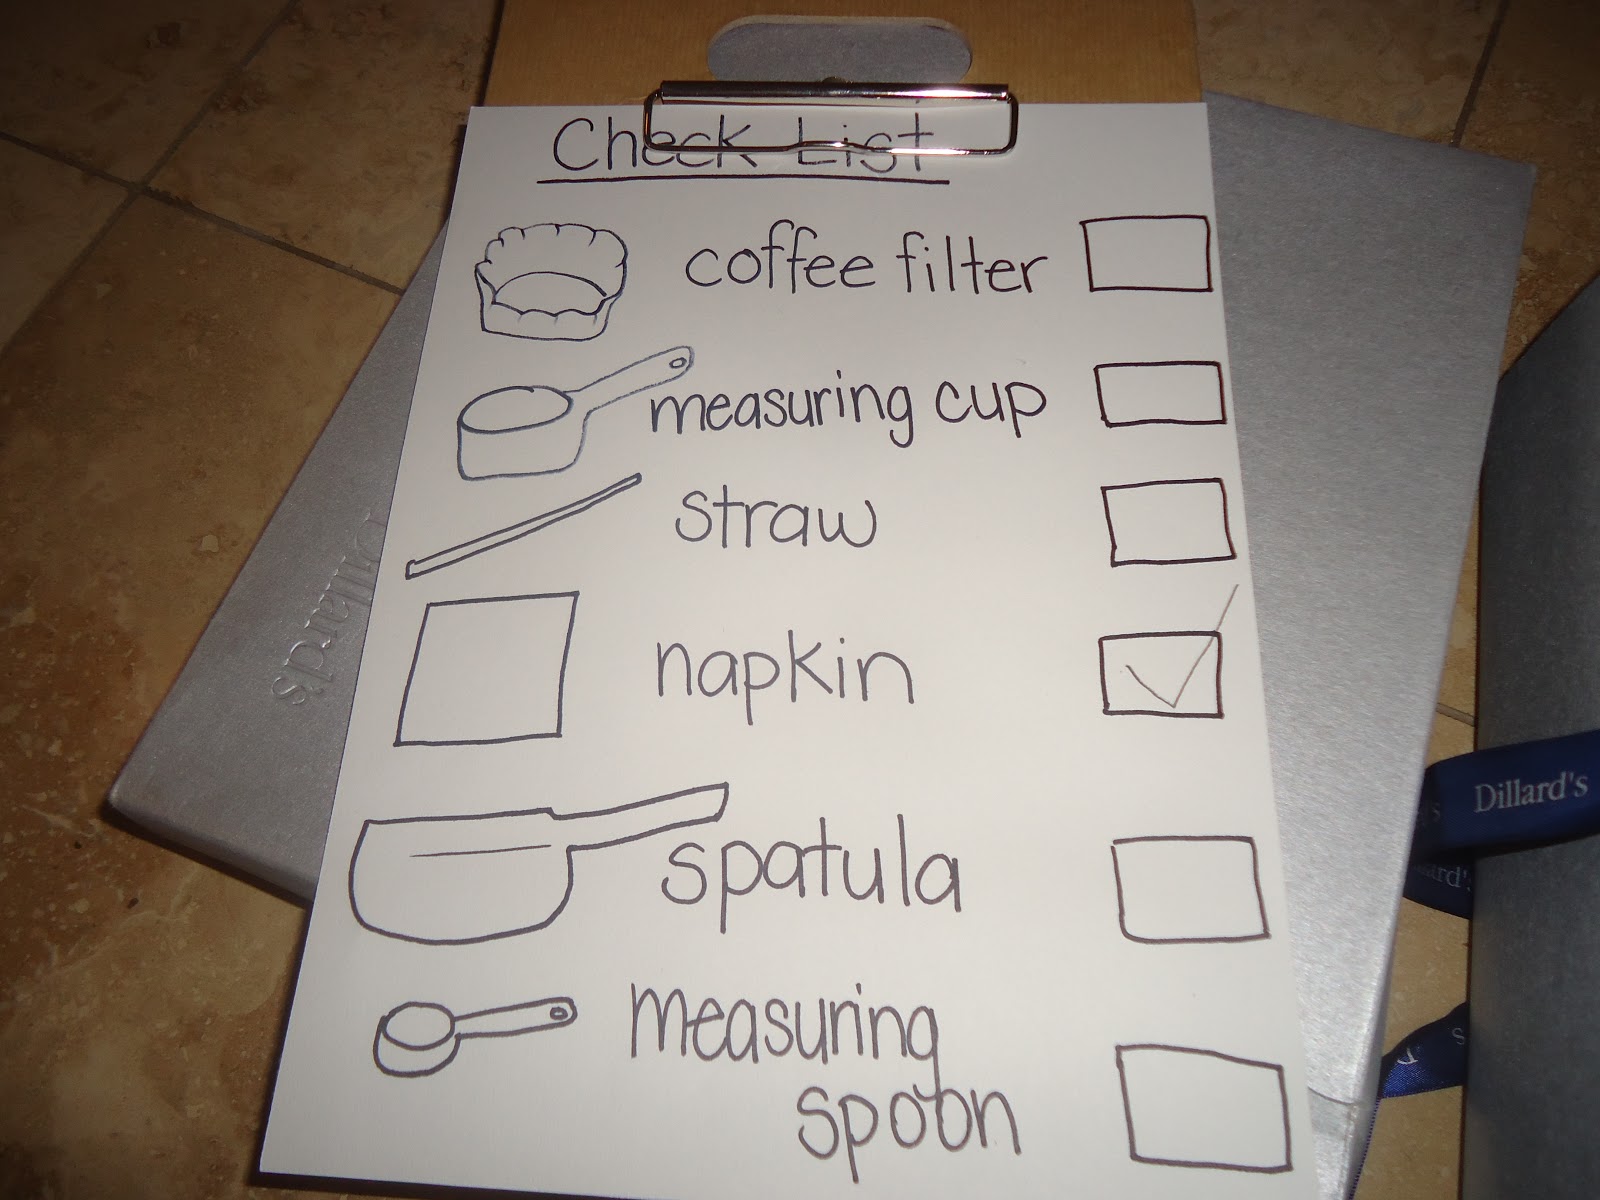
Let your little ones explore the color white with this sensory activity. Children dig through pretend snow to find white items that have been hidden.  For an added challenge, they may wear mittens to search through the "snow" and use a check list to mark off what they have found.


 Materials: Sensory tub, packing peanuts, small white items (coffee filter, napkin, straw, spatula, measuring spoons, measuring cups, cotton balls, etc.), mittens, pencil, white paper, clipboard


 Fill your sensory tub with packing peanuts to represent snow.  If you don't have a sensory tub, you may use a big box or tub like I did.

 On a piece of white paper, write a checklist of all the items you will hide in the "snow".
 Hide all the white items in the "snow".

 Let your child/ren wear their mittens and look for the items in the snow.  You may have a box or basket nearby for them to put the items they have found.

 Encourage them to find the item they found on the checklist and mark it off.  For younger children, make sure to use chubbier writing utensils. 
After they have found everything on their list, encourage them to count how many items they have found. Throughout the activity you will also be focusing on the color white. You may also introduce the word "camouflage".  Share with your child/ren that when something is camouflaged it is blending in with its surroundings.  The white items are hard to find because they are camouflaged; they blend in with the "snow" because the snow is the same color.

Friday, December 28, 2012

Snowshoe Hare

Make this snowshoe hare during a study on winter animals.  To camouflage, snowshoe hares turn brown in the summer and white in the winter.
   Materials: Cotton balls, rabbit stencil, glue, scissors, sharpie, white construction paper.
 If you right-click the picture above, you should be able to use it as a template.
Trace the rabbit pattern onto white construction paper, cut out, and draw details with a sharpie.

 Add glue all over the rabbit cut-out.
 Add cotton balls.  Cotton balls may be stretched out to take up more space.  The rabbit may also be made from brown construction paper to represent the rabbit in the summer and then covered in white to show how it changes to camouflage in the winter. 
Some children will cover the whole rabbit pattern with cotton balls, some will just put a few and some might even outline the rabbit with cotton balls.  Whatever they choose to do is acceptable.  Try to focus more on the process instead of the finished product. Let them do as much as they can on their own and ask questions throughout such as, "What do the cotton balls feel like? Why do you think these rabbits change colors in the different seasons?  Why would they turn white in the winter?"

Sunday, December 23, 2012

Snow Pal Experiment

Want to make a snow pal, but it's still too warm this winter? Don't worry, you can try this snow pal experiment at home.  In this experiment, children explore the properties of water as they discover why snow pals melt. 
 Materials:  2 dishes or pie tins, crushed ice, baby carrots, small rocks, red sour punch straws/twizzlers/or pipe cleaners.
 Fill both dishes with crushed ice.


 Add two rocks to each dish to represent eyes.

 Add a baby carrot to each dish to represent the snow pal's nose.
 Add a sour punch straw for his smile.  (This would also be a good time to talk about symmetry, since you will be making both snow pals identical.)
 Explain to your child/ren that they will be putting their first snow pal in the freezer.  Questions to ask: Where should we put the snow pal so he can stay cold? How does it feel in the freezer?  Why should we put him in the freezer?  What do you think will happen to our snow pal when we take him out in a couple of hours?
The second snow pal will be placed outside.  In a couple of hours let your child revisit their snow pals and let them describe the changes they observe.  Questions to ask:  What happened to this snow pal?  How are the two snow pals different? How are they the same? Why did one snow pal melt? Why did one stay the same? (Remember when asking young children questions, don't be particular about "correct answers".  Also, give them time to ponder, they don't need to answer right away, give them a few minutes to think about what you ask them and accept their answers.)

***I will be updating in a few hours with the results of our two snow pals

 About 3 hours after I made our snow pals, I took the one snow pal out of the freezer and I took him outside to compare him to the other snow pal.
 Questions to ask:  How do our snow pals look?  What happened to the snow pal that was left outside? Why?
Be prepared for some interesting responses from your little ones.  For example, a child once remarked, "Ms. Maria, the ice melted but the rocks stayed the same!"  I replied, "Why do you think that happened?"  By asking them more questions instead of giving them the answers right away, it gives children a chance to think and find answers on their own.

Friday, December 14, 2012

Snowman Bagels

Guide your child/ren to make these tasty snowmen out of bagels!! I used mini bagels but you may use large ones if you like.

 Materials: Mini bagels, Laughing Cow cheese wedges, pretzel sticks, chocolate chips, crunchy cheetos, plastic knife.
 Split bagel in half.

 Spread cheese. (You may also use cream cheese.)
 Apply chocolate chips for eyes, (You may also use raisins.)
 A crunchy cheeto nose,
 And 2 pretzel sticks for arms.
Voila!! You have a tasty snowperson treat! (You can also put 3 chocolate chips or raisins vertically on the bottom bagel, between the two arms, to represent buttons.  I just thought of that:/) Oooh, just had another idea, you can also add a skinny red vine candy for the mouth! I wish I would have that of these ideas when I was making it!! I'm sure you all have some ideas to add on or do differently with your edible snowman and that's great.  Be creative!!